Strategy to Get Full $200 Credit
Step 1: Get First $100 Credit
How to:
-
Visit AWS Free Tier
- Click Create Account
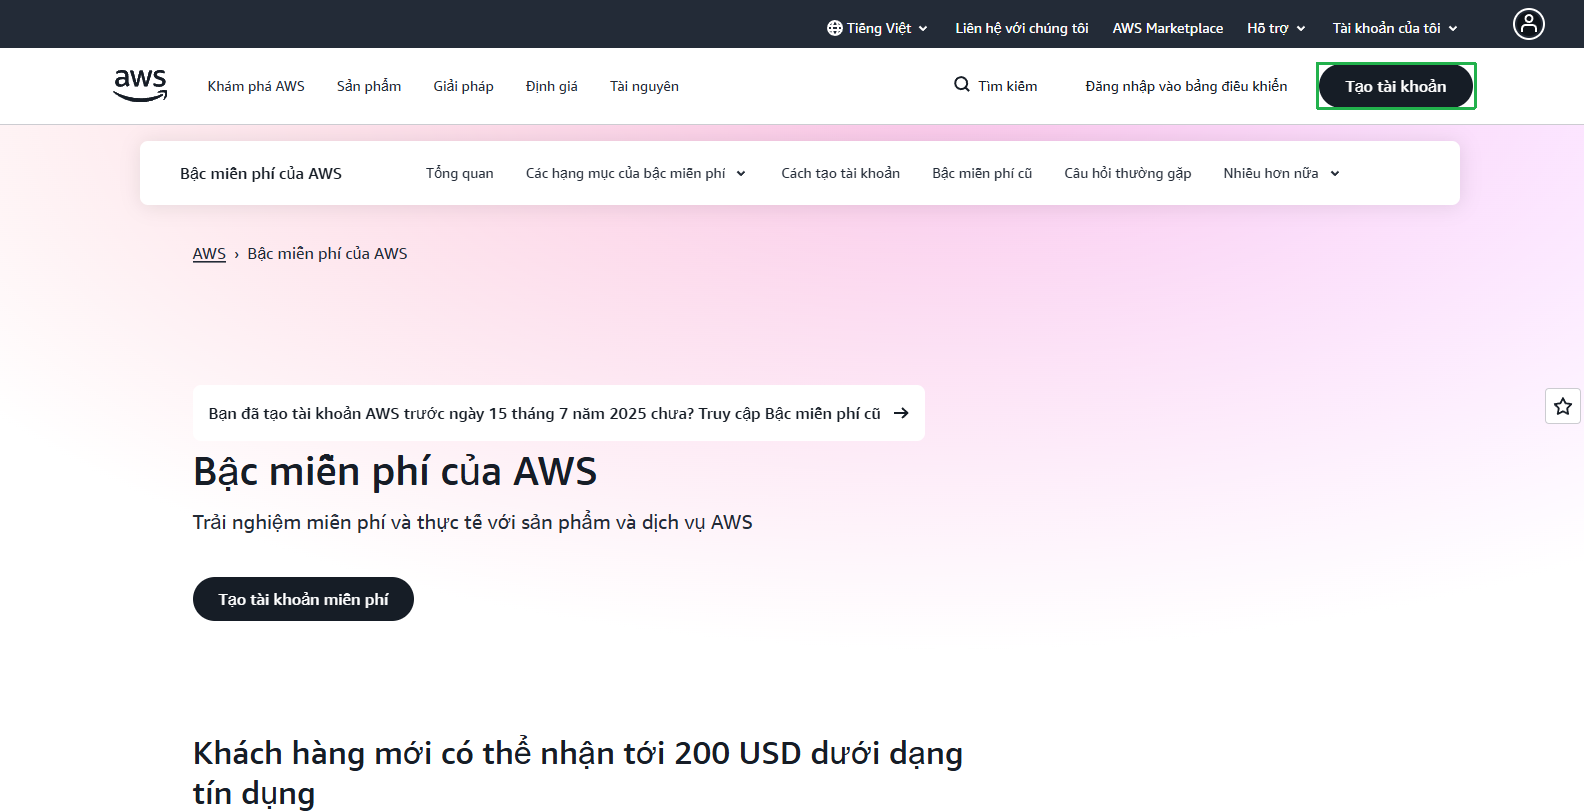
- Click Create Account
-
Enter Required Information
- Enter User email
- Enter AWS account name
- Click Verify email address
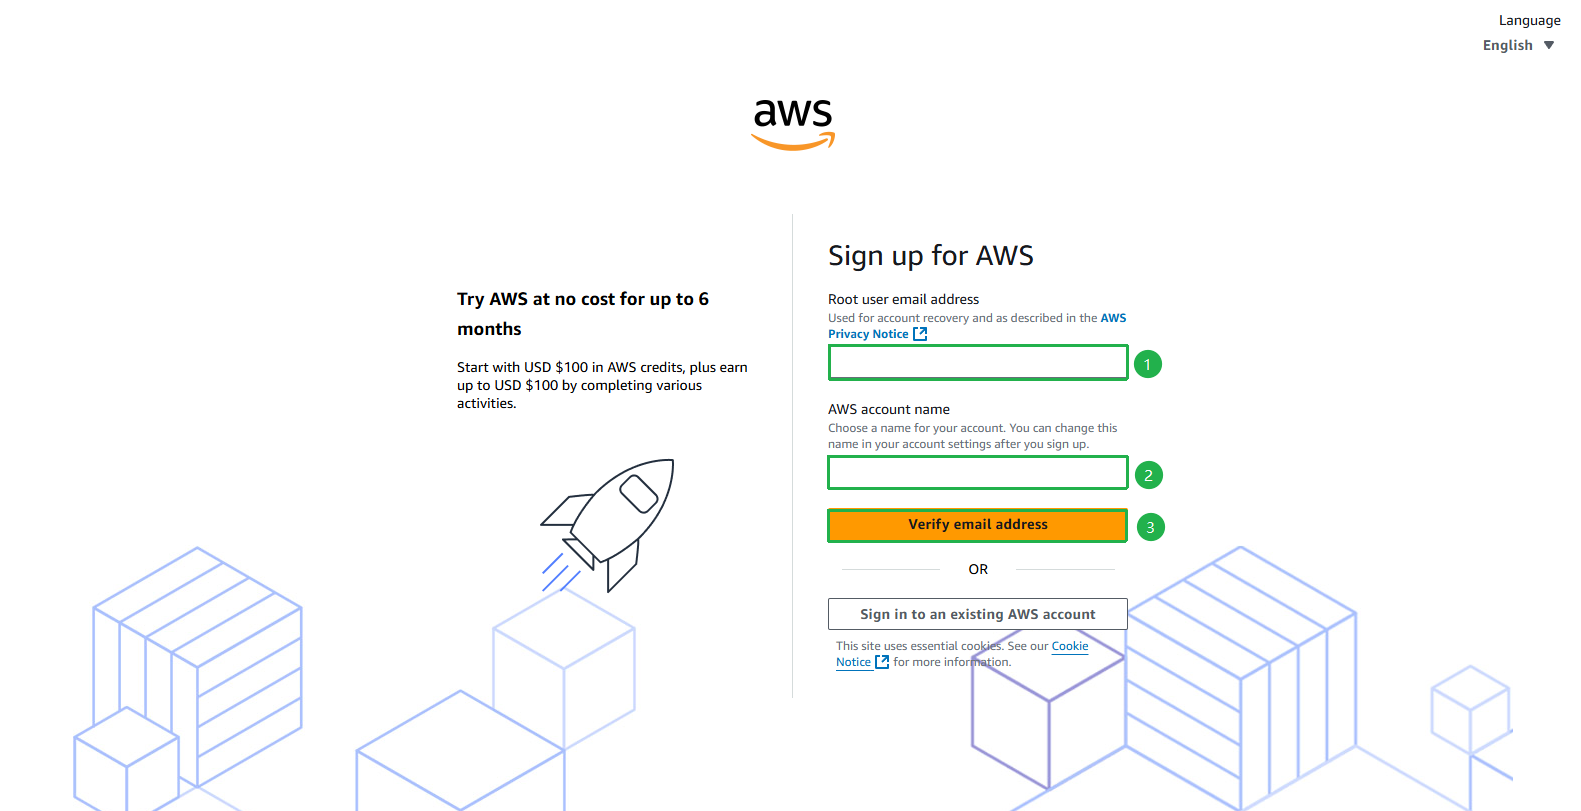
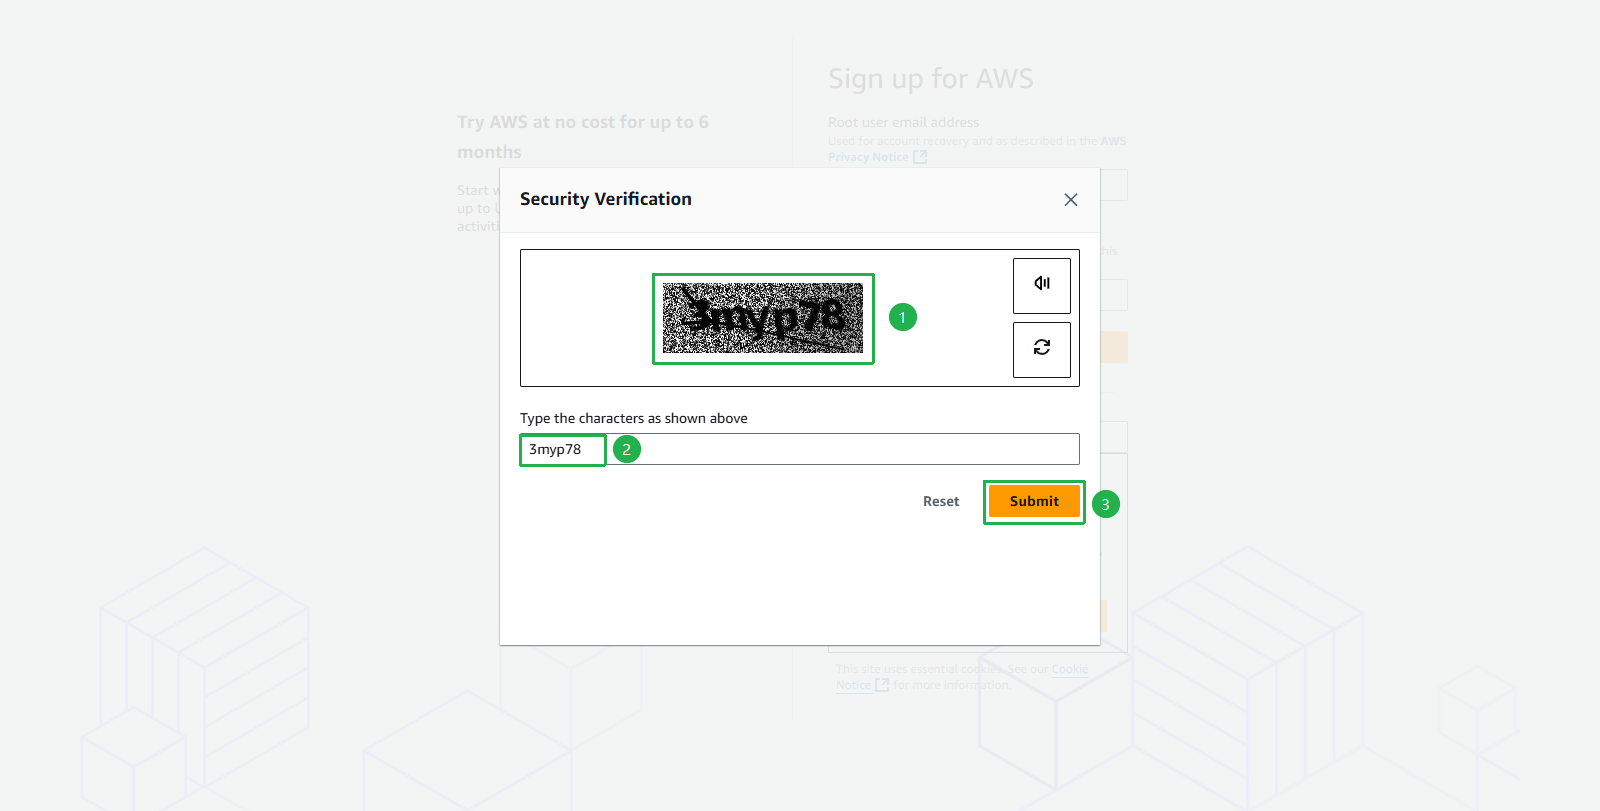
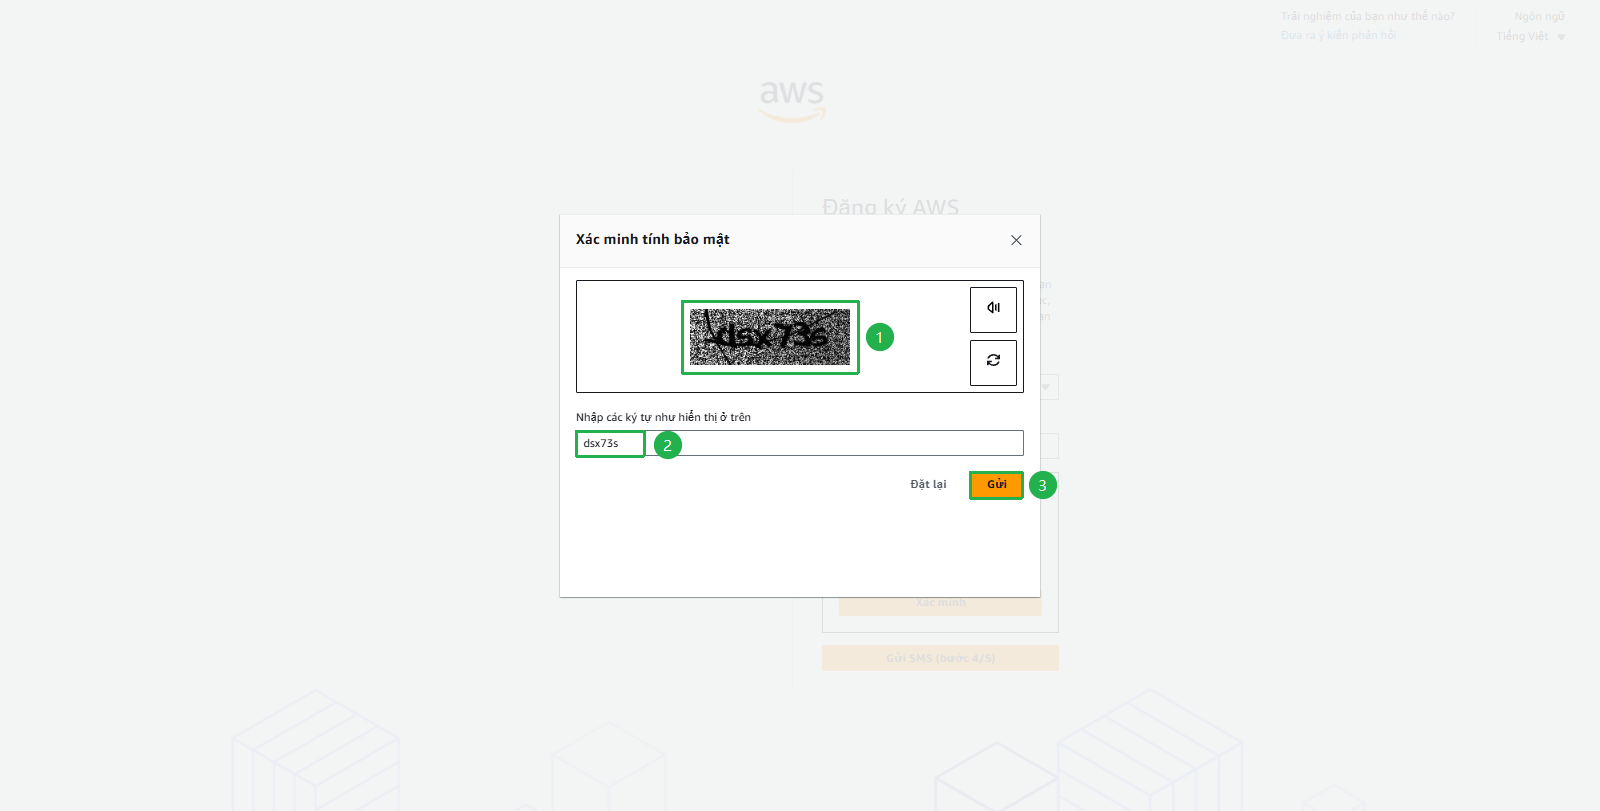
- Submit security verification
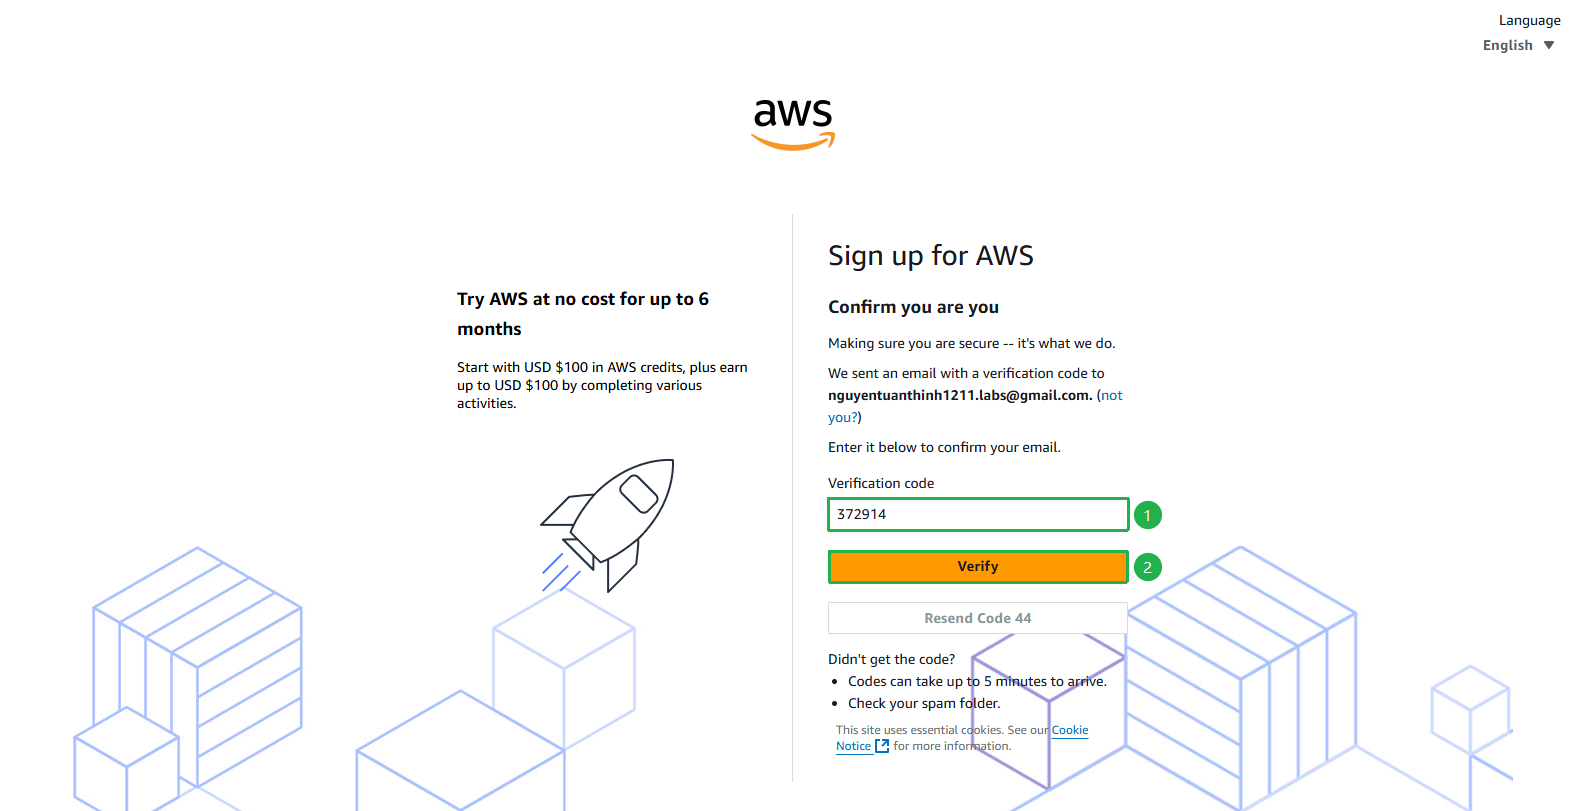
- Enter Verification Code sent to your email
- Click Verify
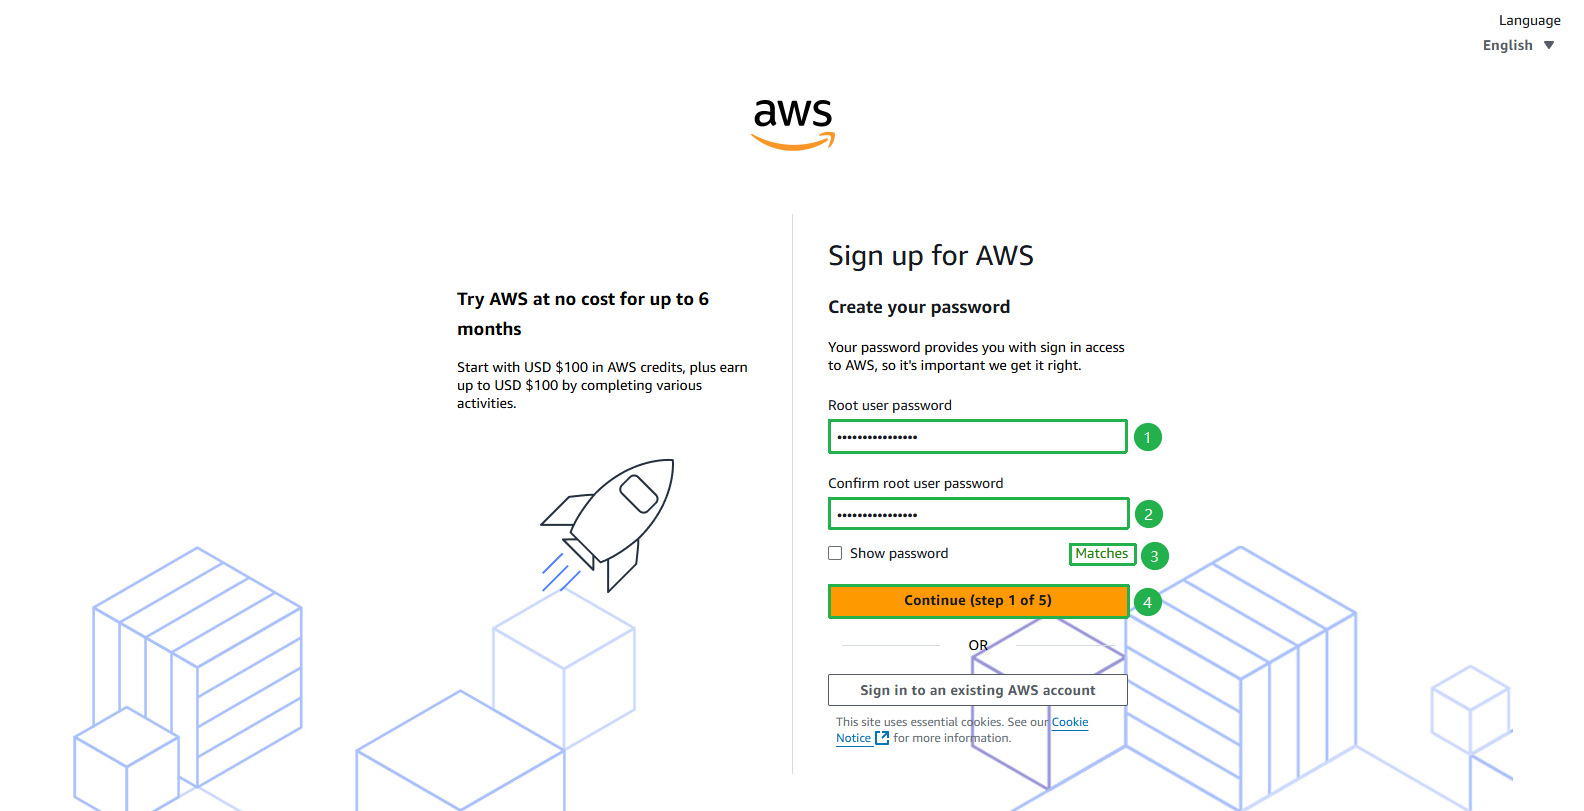
- Enter Password
- Click Continue
-
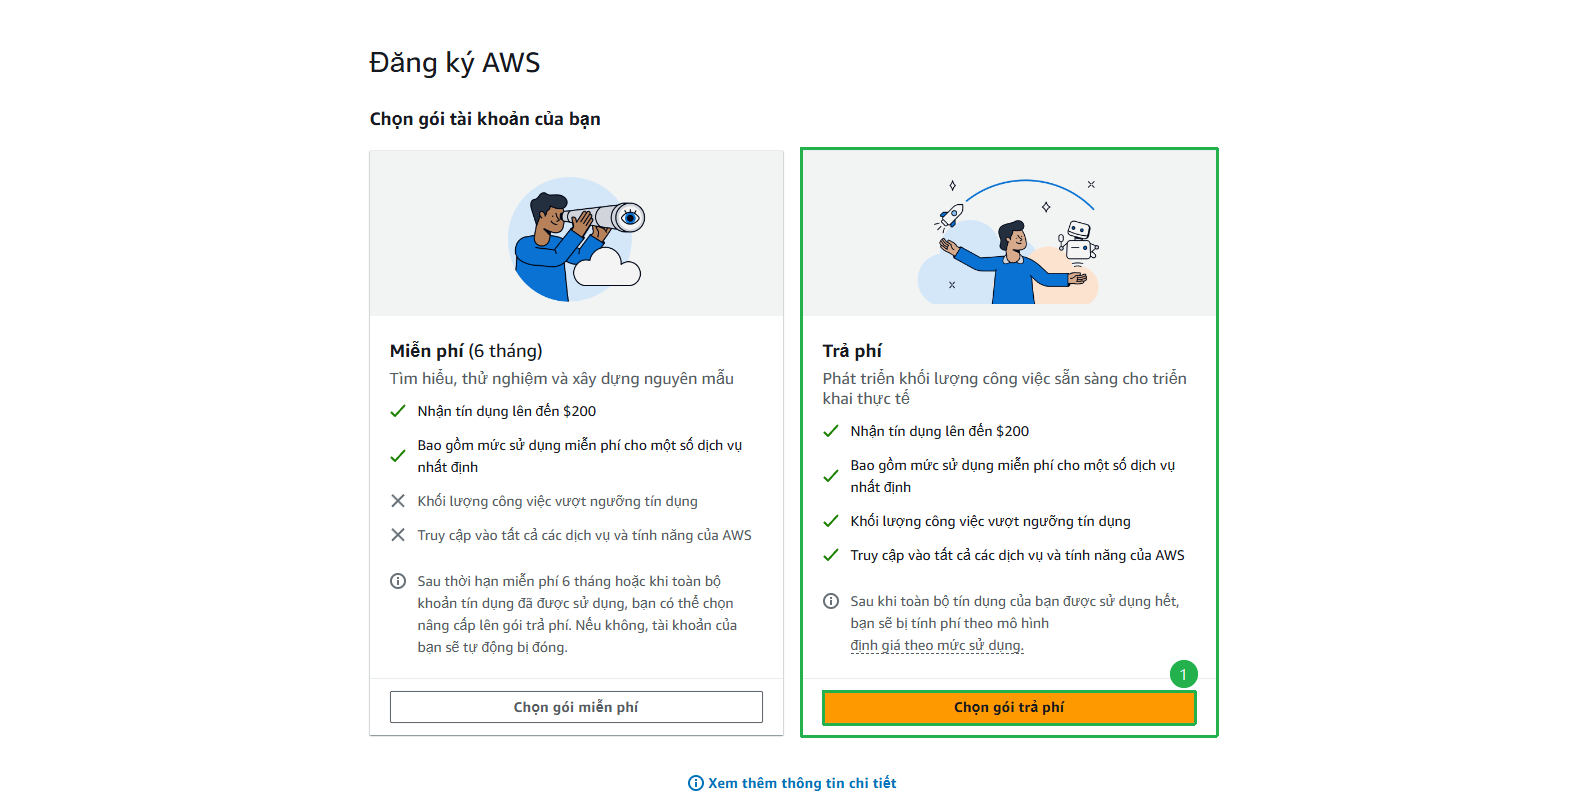
Choose Free Plan or Paid Plan
- In this guide, we will choose Paid Plan to access all AWS services and features without limitations
- Click Choose Paid Plan
-
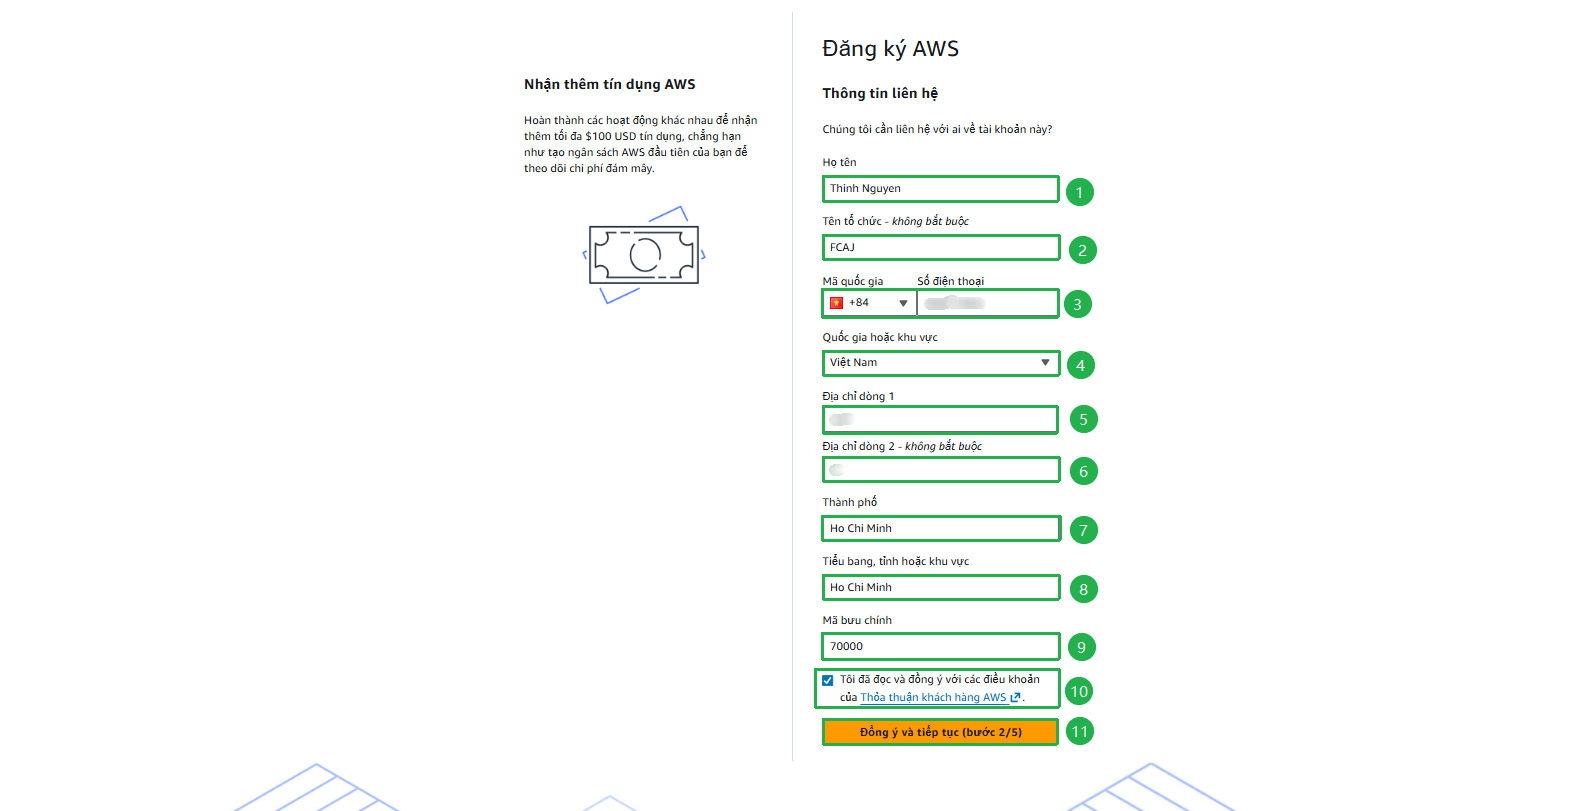
Complete registration with valid information
- Enter valid information
- Check the box I have read and agree to the terms
- Click Agree and continue
-
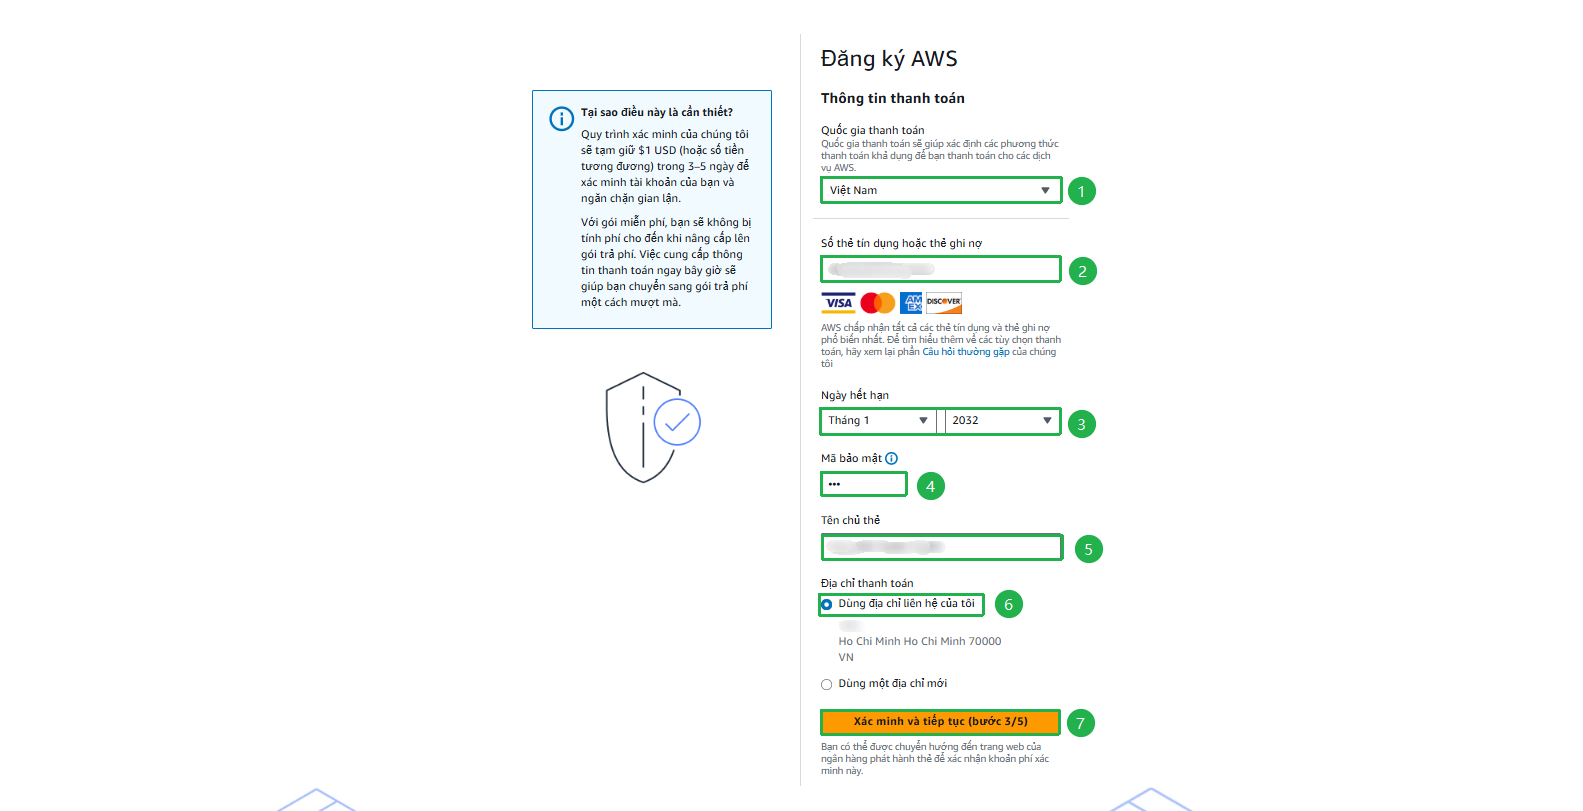
Complete Payment Information
- Enter Valid card information
- Click Verify and continue
-
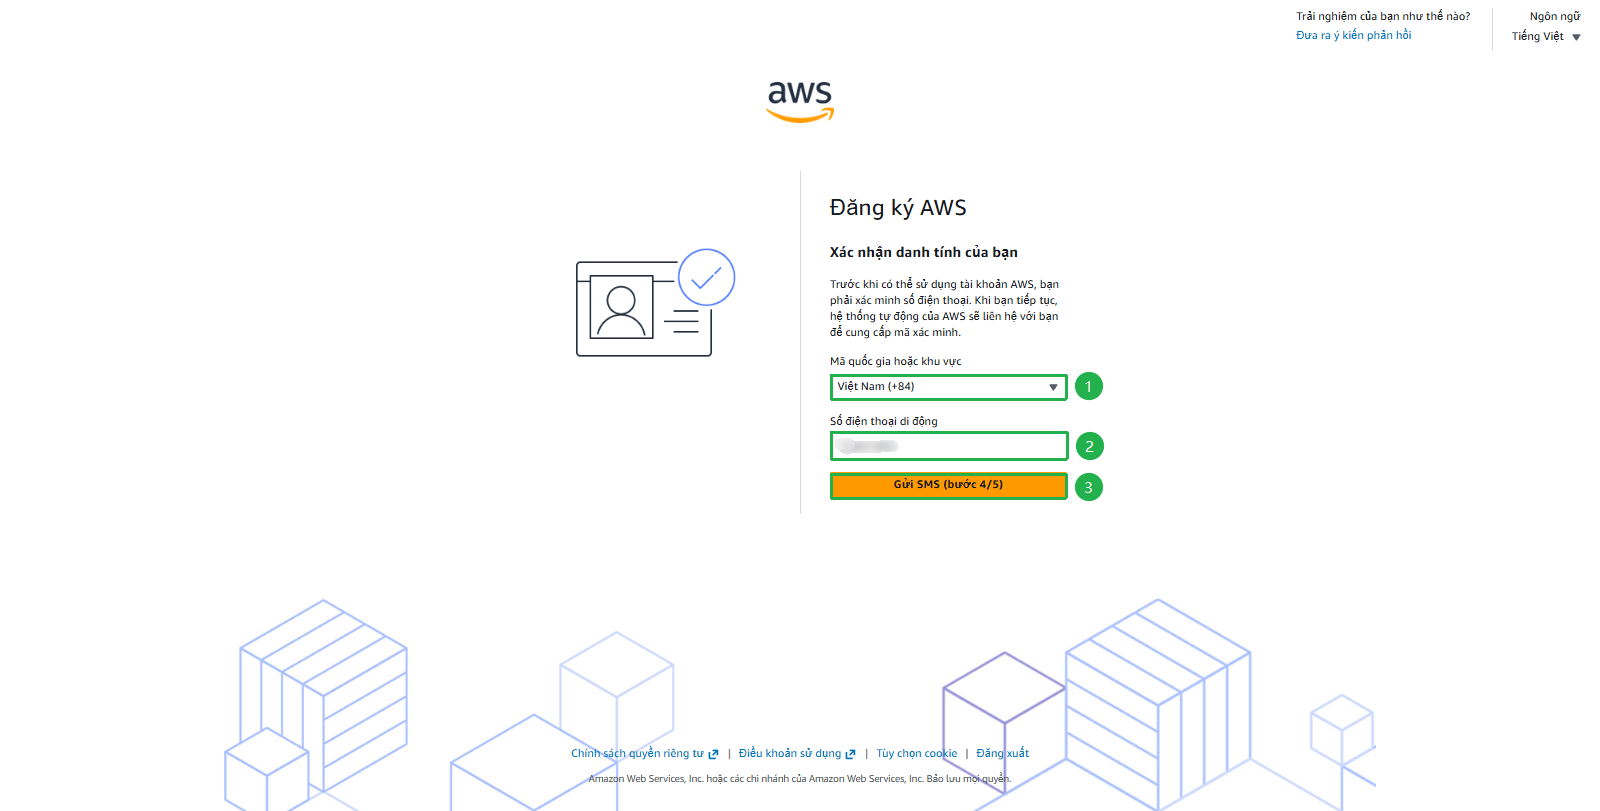
Verify Phone Number
- Select Country or region code
- Enter Mobile phone number (Remove leading 0, e.g., 945123456)
- Click Send SMS
- Enter Verification code
- Click Continue
-
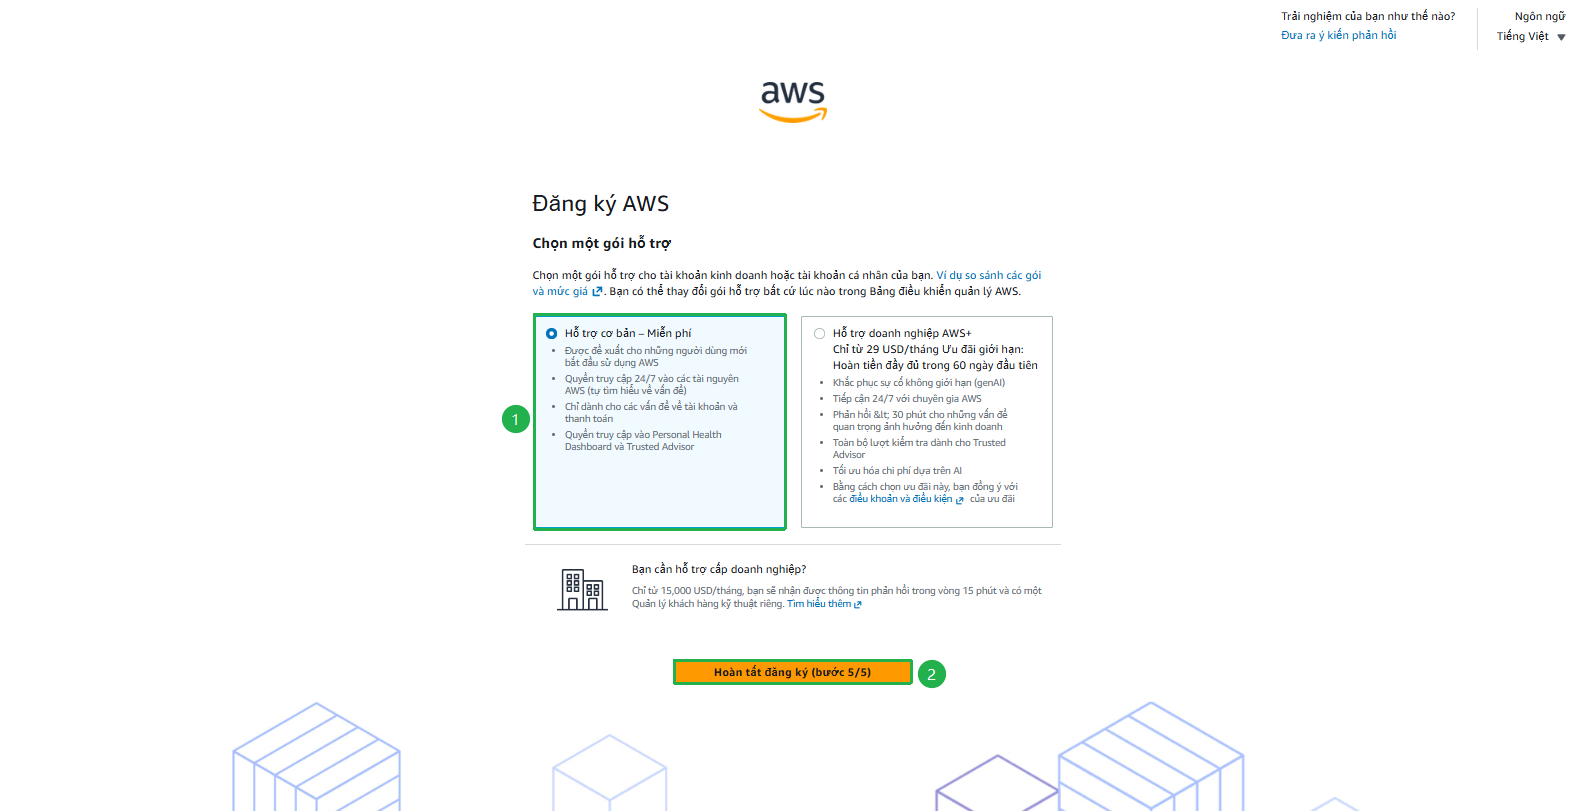
Complete registration
- Select Basic support - Free
- Click Complete sign up
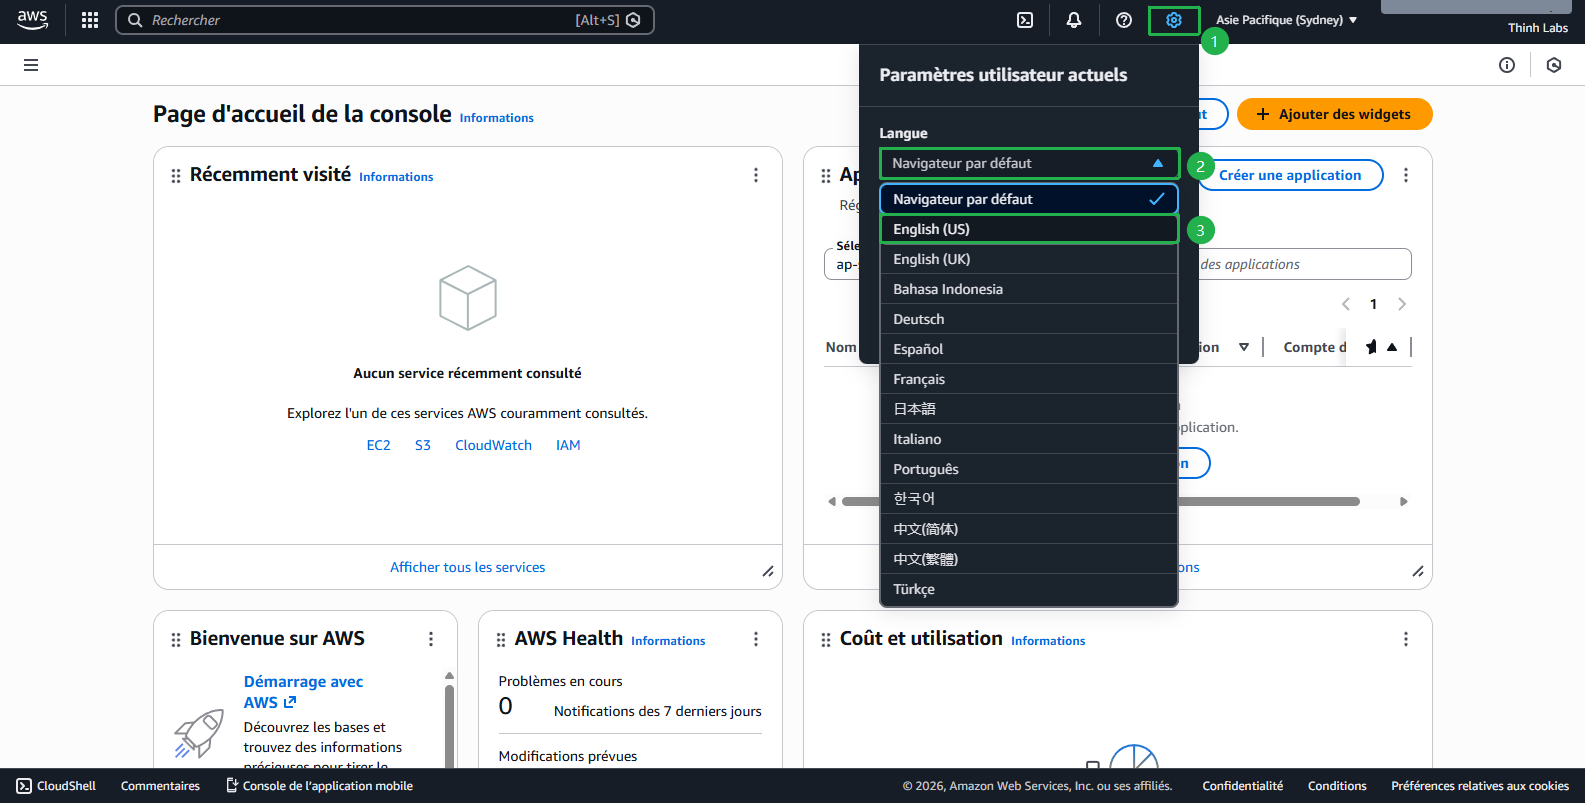
- Click Go to the Console

- Change language to English(US)
-
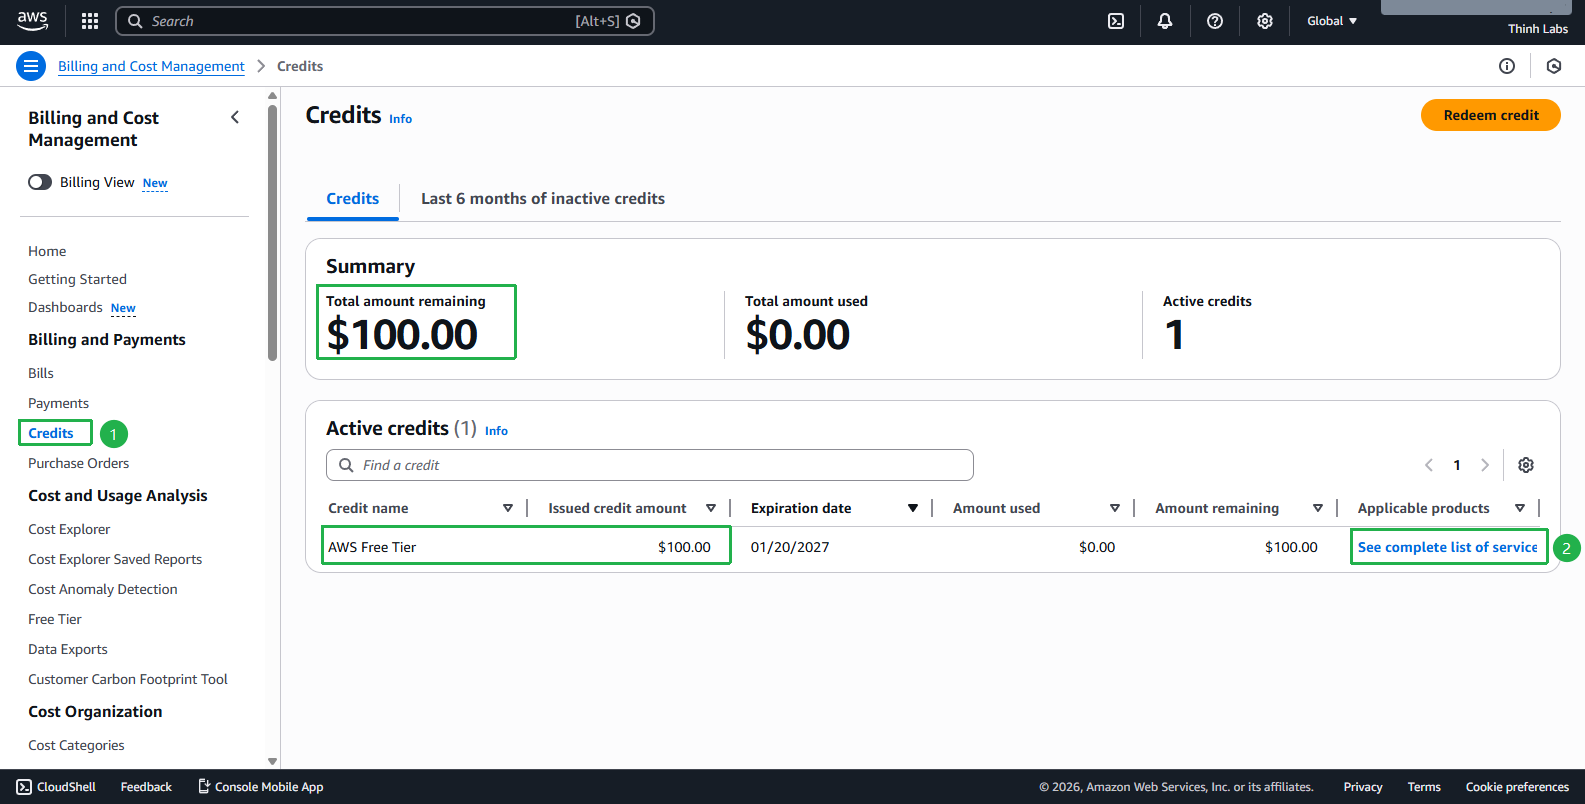
$100 credit will be added automatically
- Time: Immediately after creating account
- Check: AWS Billing Console
- Select Credits section to verify $100 credit has been added successfully
Step 2: Earn Additional $100 from 5 Tasks
Location: Find the “Explore AWS” widget on AWS Console Home
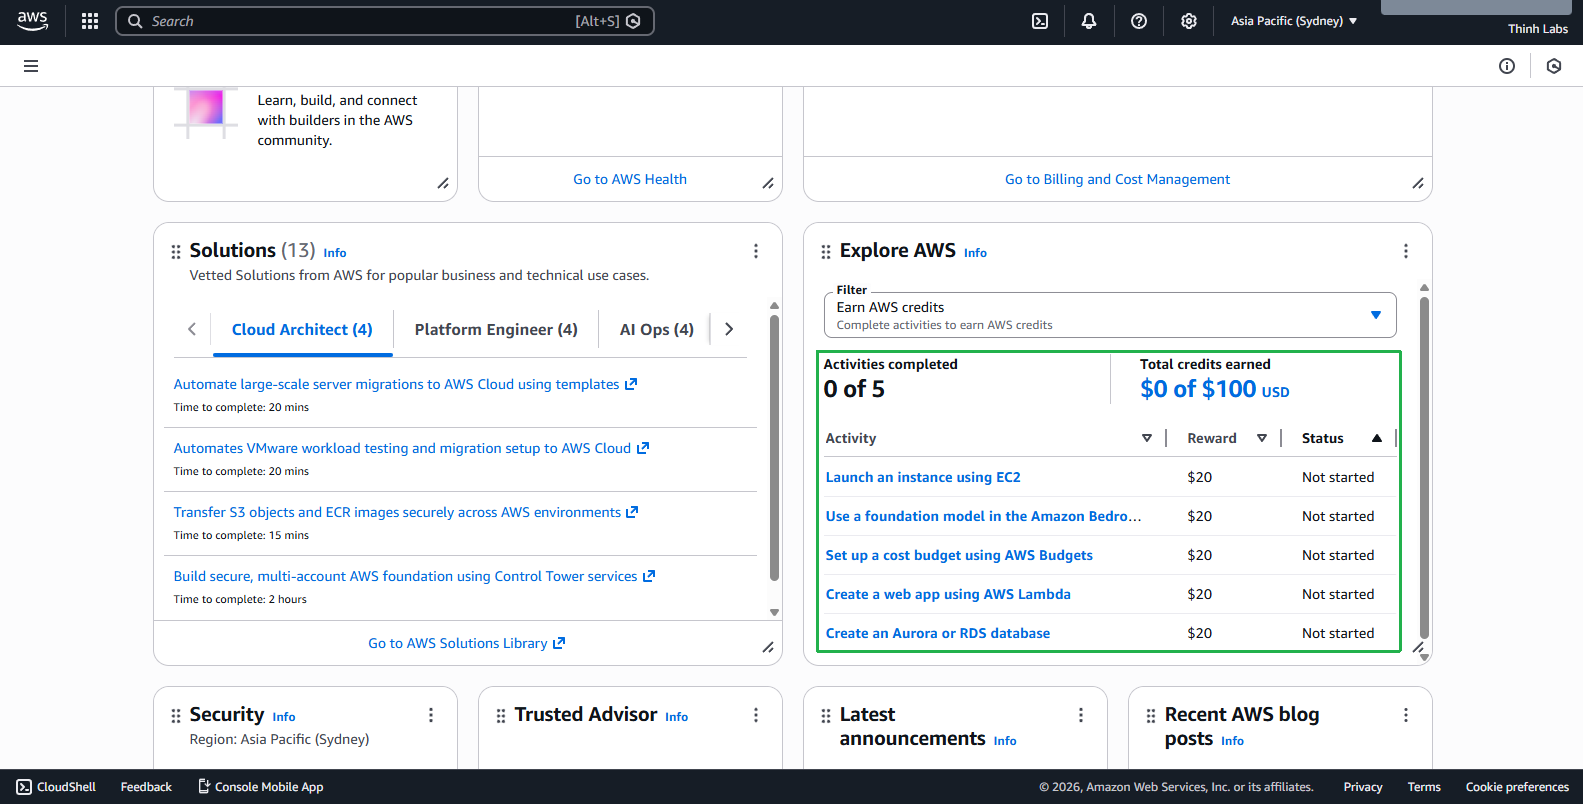
5 Required Tasks:
- Launch EC2 Instance - $20 credit
- Use Amazon Bedrock Playground - $20 credit
- Set up AWS Budgets - $20 credit
- Create Lambda Web App - $20 credit
- Create RDS Database - $20 credit
Completion Time: 2-4 hours for all tasks
Pro Tips:
- Complete tasks in order to optimize learning curve
- Use smallest instance sizes
- Clean up resources after each task
- Document the process for future reference
Credit Timeline
- Day 1: Create account → $100 ✅
- Day 2-3: Complete 5 tasks → $100 ✅
- Total: $200 credit in 3 days